
This year I decided to make pet portraits as Christmas gifts for family members. There were two styles that I did: acrylic semi-realistic, and mixed media pen & ink/watercolor for a simpler composition. Here is an outline of my processes:
Acrylic Painting
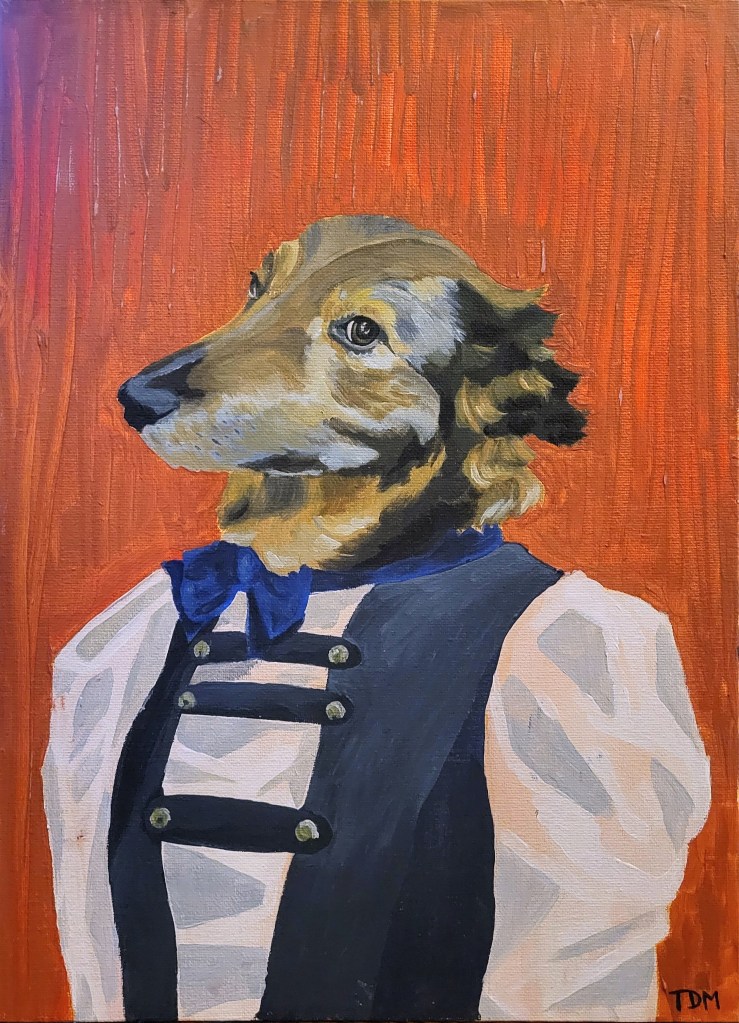
I had the idea to make this painting of a dog named “Molly” for my aunt and uncle, as they already had a similar portrait commissioned of their other dog, a black Labrador.
I made this in 4 steps, laid out below. I started with some simple pencil sketches to make sure I could capture her likeness. Then I did some value sketches with charcoal to figure out the focal points and how to plan around them. Thirdly, I did the underpainting with pencil and various shades of orange, and then finally added color.
1. Preliminary Sketches
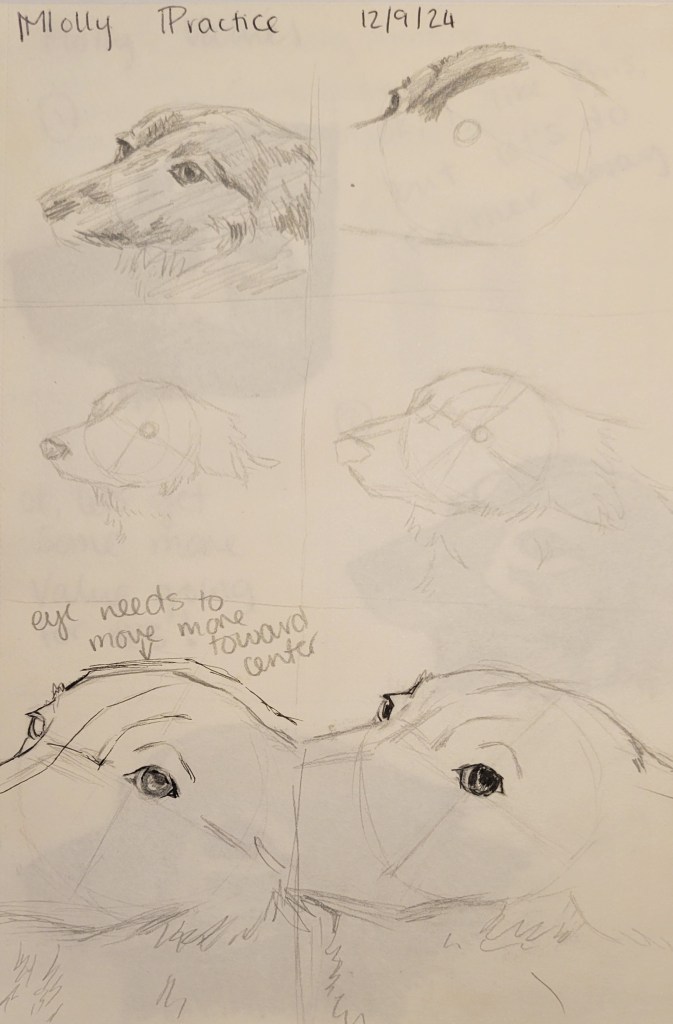
These are the sketches I did to figure out the proportions of her head. You can see that I just re-drew her a few times to make sure I was getting the placement of everything correctly, and that my drawings looked like the reference picture I had chosen.
2. Value Sketches
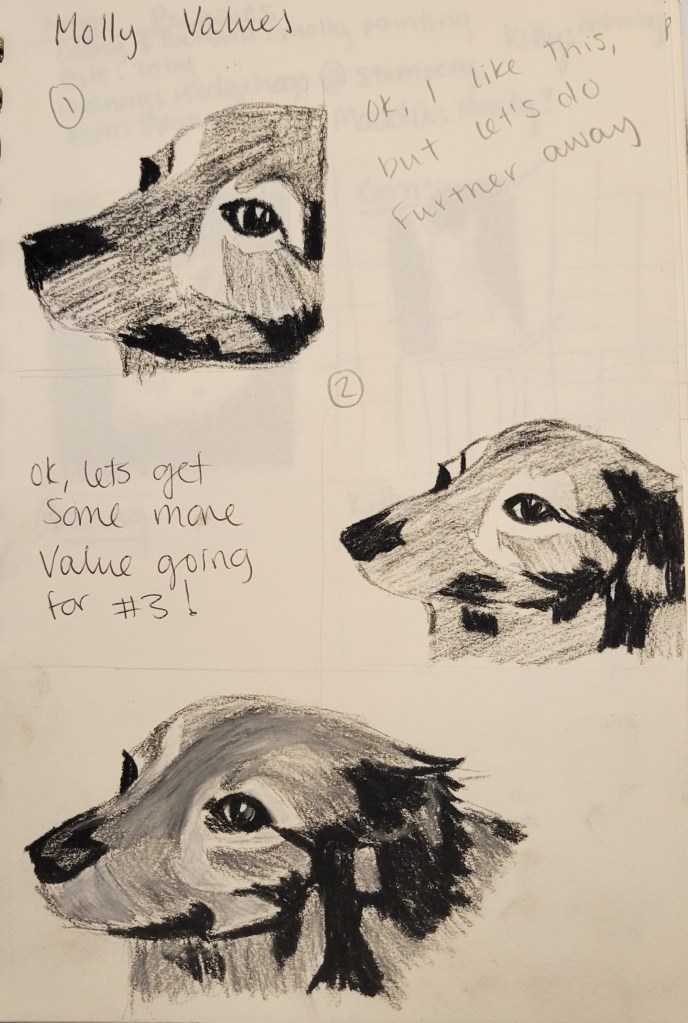
Value sketches are used by artists to decide on what variations of colors they want to use. If you convert your painting to greyscale, you want the features to be distinguishable by varying values.
Having different colors that are of similar value make the details indistinguishable from far away, so it’s imperative to get a good understanding of the different values in your painting before adding color.
3. Underpainting
I don’t have a picture of the underpainting, but I picked a midtone orange. It’s important to use a midtone (equivalent to a medium gray on the value scale) because a white canvas often makes artists exaggerate their highlights too much. Then, using a lighter orange to paint in my highlights and a darker orange/brown for the blacks, I essentially painted my value sketch onto the canvas using oranges.
4. Final Painting
Finally, using the actual colors that I wanted to use, I painted over the underpainting. Lots of artists elect to use part of the underpainting in the final piece, but I have the entire underpainting covered up by the finishing layer.
Watercolor + Pen & Ink Portraits

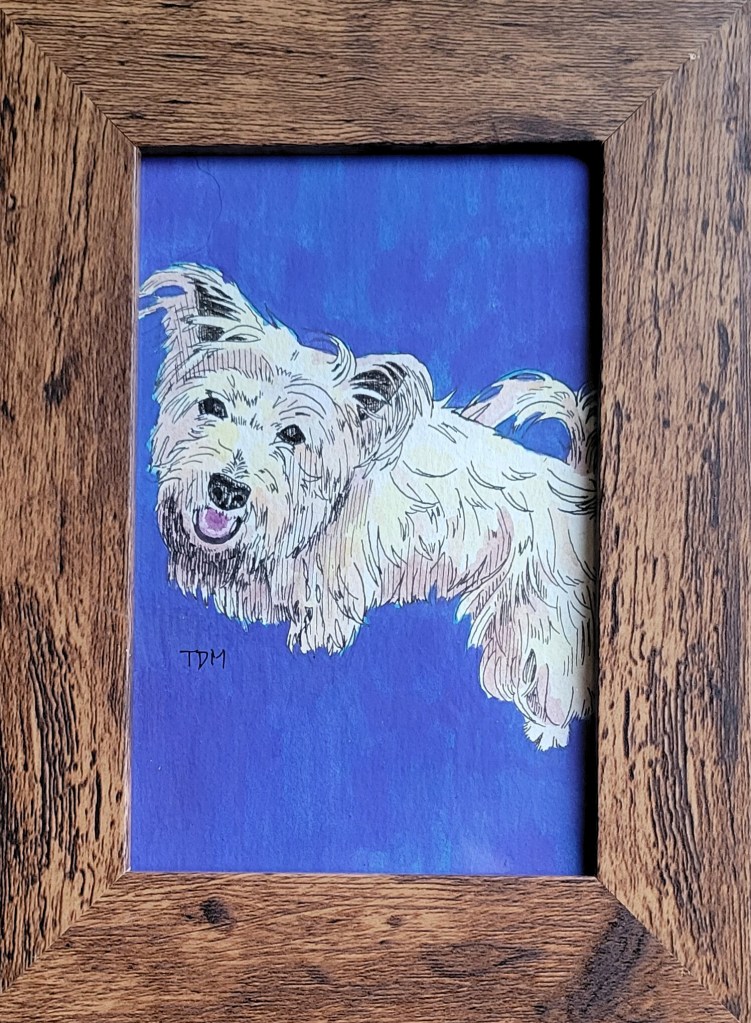
For these two paintings of Spotty (horse) and Toby (dog), I actually used GIMP, which is essentially a free version of Adobe Illustrator. I was on a time crunch, so instead of doing multiple sketches like the previous piece, I uploaded the images and created a general outline of the animals.
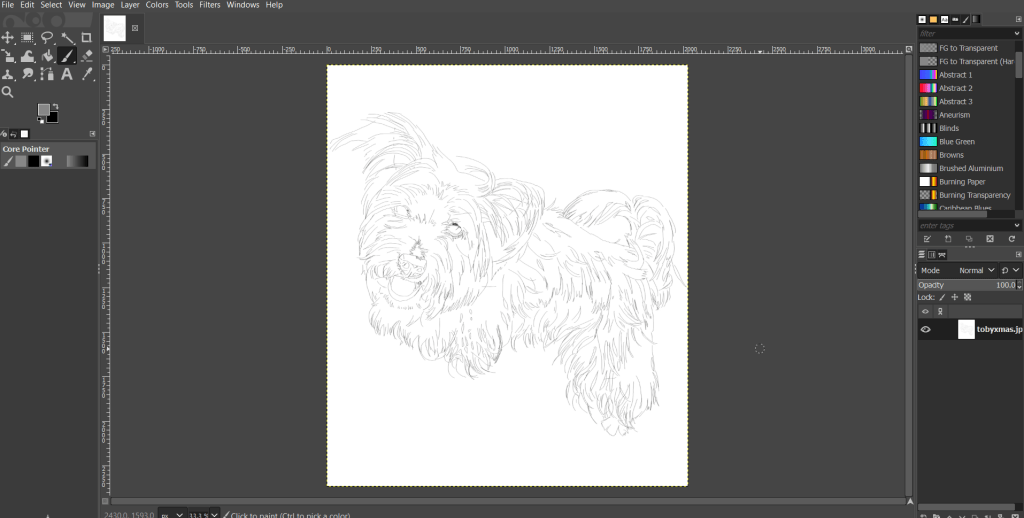
I printed the outlines into regular printer paper, and then traced them lightly onto watercolor paper with pencil. Then, using my pens, I was able to translate the images into my art style.
Typically, I would have done the entire thing by hand, but making 4 complete artworks in time for Christmas is no easy feat!
Before painting onto the drawings, I did some testing to make sure the ink wouldn’t smudge with watercolor painting on top. When I’d confirmed that it would come out alright, I proceeded to paint on the animal first, and then allowed them to dry overnight. I did the backgrounds the next day, choosing bright colors that contrasted well with the fur colors of each animal.
